
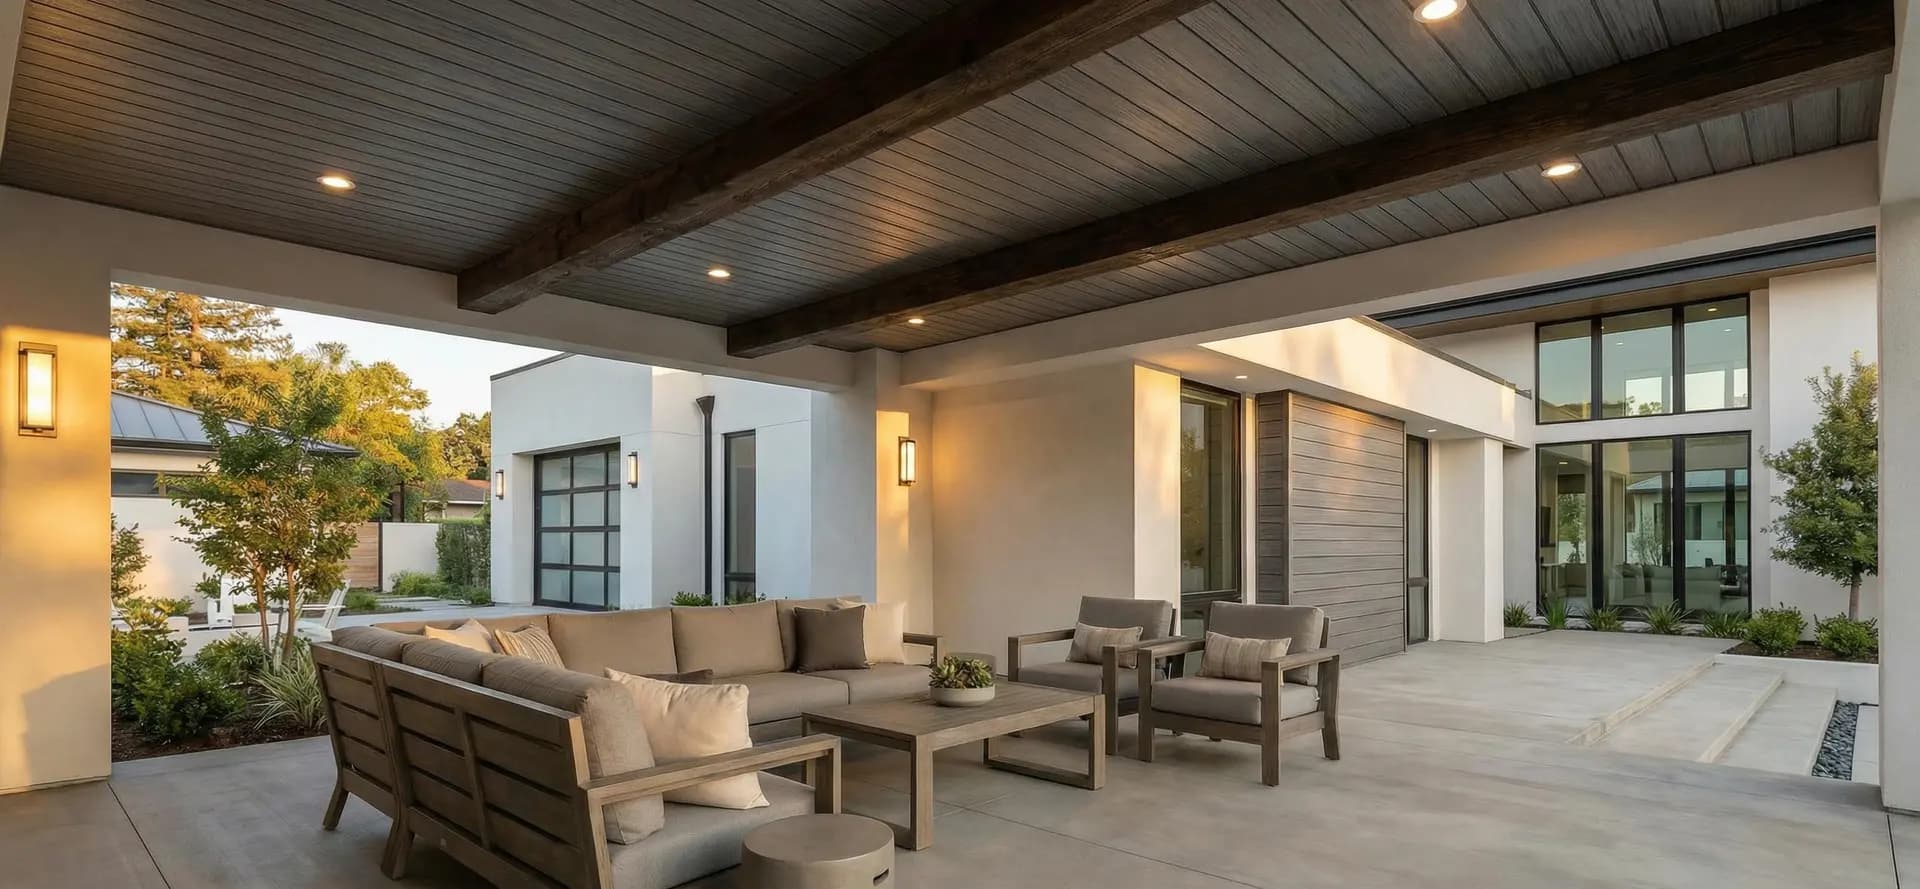
An overhead finish needs more than an attractive panel direction. Resolve exposure, service zones, access and perimeter details before finalizing the ceiling module.
Key Takeaways
- Coordinate overhead layouts with the wall elevations and service locations before ordering.
- Lights, fans and other equipment need an approved support strategy; do not assume the finish carries them.
- Resolve maintenance access explicitly rather than assuming every panel is removable.
Planning an exterior aluminum ceiling begins with the space it covers and the services it conceals. A porch, entry canopy and open-sided circulation area can share a linear appearance while requiring different exposure, support and access decisions. In Barcode Cladding’s aluminum product range, overhead finishes are a distinct application: they should be selected and detailed for that role, not treated as wall cladding simply turned sideways.
Establish Exposure and the Role of the Ceiling
Identify whether the finish is sheltered, open at its edges or exposed to wind-driven rain. Describe the roof or construction above it and any enclosed space between. The visible ceiling is not automatically the waterproofing layer, a ventilation system or a rated fire-protection assembly. Identify those functions in the project documents and confirm how they are maintained at penetrations and edges. The selected system’s suitability must match the actual exposure rather than the broad label ‘exterior.’
Draw the Overhead Layout With the Elevations
A reflected ceiling plan shows the overhead layout in relation to the occupied space below. Carry wall datums from the architectural design and specification process into that plan so the entry, glazing, columns and ceiling lines work together. Establish the setting-out direction and resolve partial modules at the perimeter. With the module and service zones established, compare available aluminum soffit and ceiling systems against the project’s exposure and attachment requirements.
- Set the layout datum from a deliberate architectural feature.
- Show panel direction, joints, edges and changes in level.
- Locate visible equipment before accepting the repeated module.
- Coordinate the ceiling drawing with structural and services information.
Integrate Lighting and Services Without Loading the Finish
Recessed lights, cameras, speakers, sprinklers, signs and fans can interrupt an otherwise regular field. Establish their locations, openings and support responsibilities early. Do not assume a decorative panel can carry equipment or that an accessory can attach to a concealed rail without approval. A fan also introduces movement and loads that need their own consideration. Coordinate fire-protection devices with the responsible specialist so visual alignment does not override the system’s requirements.
Plan Maintenance Access Before Closing the Ceiling
Identify equipment, connections and inspection points that must remain reachable. Confirm whether the selected ceiling assembly permits local removal, requires sequential disassembly or needs a separate access solution. Do not promise individual-panel removability based on a concealed-fixing appearance. Access openings should be dimensioned for the actual maintenance task, not simply fitted into the smallest available module. Check the removal path and working clearance around adjacent fixtures as well as the opening itself.
| Item to coordinate | Question to resolve |
|---|---|
| Light driver or connection | How can it be reached and replaced? |
| Inspection point | What opening and working clearance are required? |
| Removable section | What is the documented removal and reinstatement sequence? |
| Visible access closure | How does it align with joints and adjacent finishes? |
Separate Gravity, Wind and Movement Decisions
An overhead assembly must remain supported under its applicable loading conditions. Gravity support is not the only issue for an open canopy; project wind effects also need review. Obtain the selected system’s overhead-use documentation and coordinate the supporting structure and connections with the responsible designer. Thermal movement, building movement and perimeter clearances must follow the approved details. A neat visual joint cannot substitute for the required movement provision, and a wall fixing diagram is not evidence of an approved ceiling installation.
Resolve Perimeters and Finish Transitions
At an entry or overhang, coordinate panels, battens and soffits so visual continuity does not conceal differences in support, movement or water management. Show how the ceiling terminates at a wall, fascia, beam or open edge. Confirm where drainage or ventilation belongs in the surrounding assembly without using the finish joint as an improvised solution. At exposed edges, review the appearance from below and from the approach path, where backing or unfinished surfaces may become visible.
Review Samples Under the Actual Lighting
An overhead surface is often viewed in shade, with reflected daylight or at night under artificial lighting. A sample approved in direct sun may not represent those conditions. Review the selected finish overhead if practical, alongside adjoining walls and trims. For wood-look material, establish grain direction and consider how repetition reads across the ceiling. Keep approval focused on actual samples and the selected assembly; a rendering cannot establish an exact finish match or the appearance of every joint.
Complete a Pre-Order Coordination Check
Before releasing the ceiling package, bring the reflected ceiling plan, sections, services layout and selected-system details together. Resolve discrepancies while the design can still change, rather than cutting unplanned openings into finished material on site. The submission should clearly separate approved appearance from engineering and installation responsibilities.
- Exposure and overhead-use suitability confirmed for the selected system.
- Panel direction, starting datum and perimeter modules coordinated.
- Equipment locations and independent support responsibilities resolved.
- Maintenance access and removal sequence documented.
- Support, wind, movement and adjacent water-management details reviewed.
- Finish samples and visible edge conditions approved for the project.
Frequently Asked Questions
Can aluminum wall cladding be used on a porch ceiling?
Do not assume it can. Confirm overhead-use suitability, attachment details, support and exposure requirements for the specific system and project.
Can lights or fans be supported by the aluminum ceiling panels?
Do not assume the finish carries equipment. Establish an approved support arrangement with the responsible designers and installers.

About the author
Jay Zdun
Founder, Barcode Cladding
Jay Zdun is the founder of Barcode Cladding. He specializes in aluminum façade systems and helps architects, builders, and property owners evaluate profiles, finishes, and installation considerations for modern exterior projects.
Connect on LinkedIn